In today’s world, the need for remote access is growing rapidly—especially when we need to control our computers from anywhere. Windows 11 Remote Desktop is a powerful feature that allows you to access your PC from any location. In this article, we will explain in detail how to enable Remote Desktop in Windows 11, how to set it up, and how to use it securely.
What is Remote Desktop?
Remote Desktop is a technology that allows us to control our computer from another device. By using it, you can:
Access your office PC from home
Use files and software remotely
Easily perform IT support and troubleshooting tasks
Requirements for Enabling Remote Desktop in Windows 11
Before enabling Remote Desktop, keep a few important points in mind:
Your system must be running Windows 11 Pro, Enterprise, or Education Edition.
This feature is not available by default in the Home Edition.
You must have a stable internet connection.
A password is required for the user account used for remote access.
How to Enable Remote Desktop via Settings
Step 1: Open Settings
Click on the Start Menu.
Go to Settings.
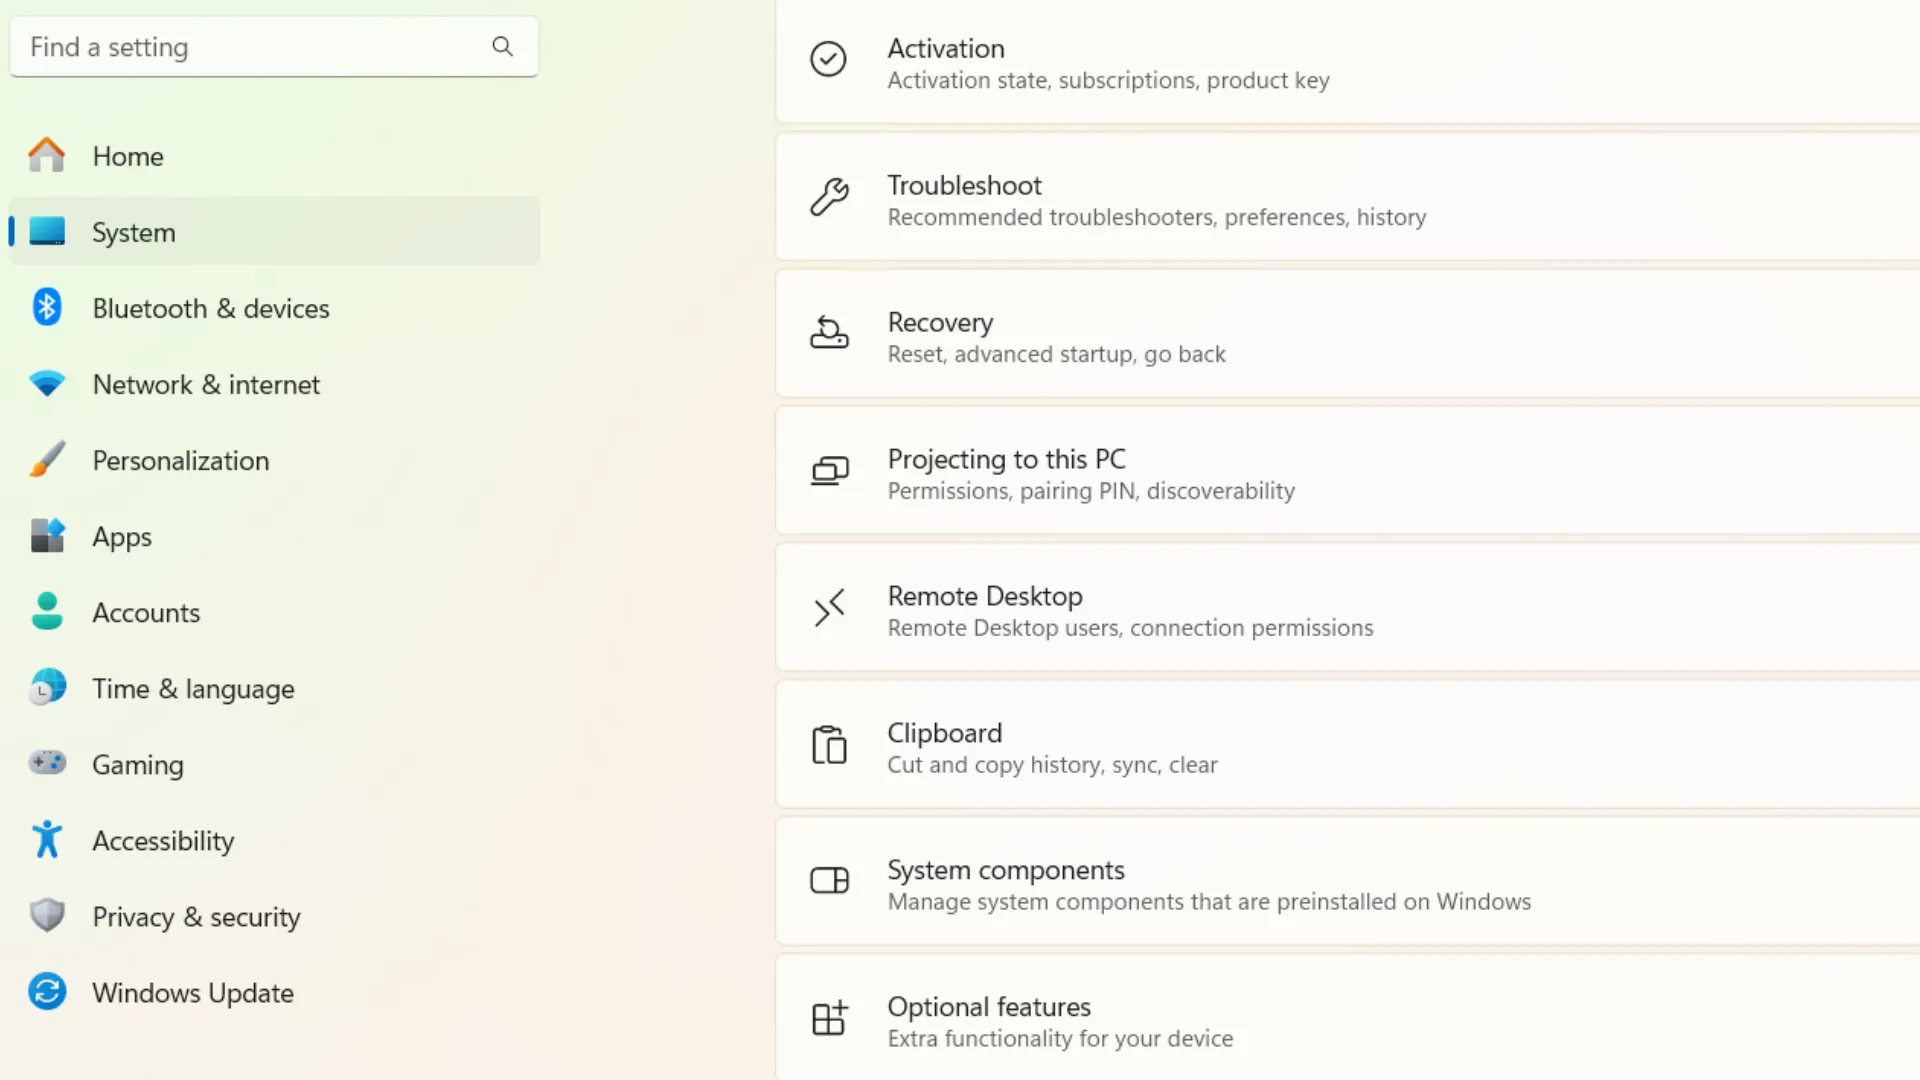
Click on System.
Step 2: Select the Remote Desktop Option
Scroll down within the System section.
Click on the Remote Desktop option.
Step 3: Enable Remote Desktop
Toggle the switch to the “ON” position.
Click “Confirm” to verify the change.
Step 4: Note Down Your PC Name
Your PC Name will appear in the “How to connect to this PC” section.
Note this down, as you will need it for future connections.
How to Enable Remote Desktop via Control Panel
Step 1: Open the Run Command
Press Windows + R.
Type: `sysdm.cpl`
Step 2: Open the Remote Tab
Once the System Properties window opens, navigate to the Remote tab.
Step 3: Allow Remote Access
Select the option “Allow remote connections to this computer.”
Click Apply, then click OK.
Allowing Remote Desktop in the Firewall
Remote Desktop will only function if your firewall allows it. Steps:
Open Control Panel
Go to Windows Defender Firewall
Click on “Allow an app through firewall.”
Check Remote Desktop
Enable Network Level Authentication (NLA)
Enabling Network Level Authentication (NLA) is essential for security purposes.
How to Enable:
Go to Remote Desktop Settings
Toggle “Require devices to use Network Level Authentication” to ON
Setting Up Port Forwarding for Remote Desktop
If you wish to access your PC from an external network (via the Internet), setting up Port Forwarding is necessary.
Steps:
Log in to your router settings
Forward Port 3389
Enter your PC’s IP address in the “Internal IP address” field
How to Find Your IP Address
Steps:
Open the Command Prompt
Type: `ipconfig`
Note down the IPv4 Address
How to Connect via Remote Desktop
Connecting from a Windows PC:
Search for “Remote Desktop Connection” in the Start Menu
Enter the PC Name or IP Address
Enter your Username and Password
Click on Connect
How to Access Remote Desktop from a Mobile Device
You can also access Remote Desktop from your mobile device.
Steps:
Download the Remote Desktop App from the Play Store
Open the App
Click on “Add PC”
Enter the IP Address
Fill in your login credentials
Common Problems and Solutions for Remote Desktop
1. Connection Error
Check your Internet connection
Ensure the PC is turned ON
2. Access Denied Error
Enter the correct username and password
Check for Admin permissions
3. Firewall Blocking Issue
Enable Remote Desktop within your Firewall settings
How to Secure Remote Desktop
Security is paramount; therefore, keep the following points in mind:
Use a strong password
Keep NLA enabled
Consider changing the default port
Use a VPN
Install regular Windows updates
Also read: PlayStation Network Down: PSN Server Outage, Status, and Complete Information for PS5 Users
Remote Desktop Advanced Settings
1. Multiple User Access
You can enable multiple sessions via the Group Policy Editor.
2. Changing the Custom Port
You can change the port using the Registry Editor.
3. Performance Optimization
Enable Low Bandwidth Mode.
Keep background applications disabled.
Remote Desktop vs. Remote Assistance
| Feature | Remote Desktop | Remote Assistance |
| —————- | ————– | —————– |
| Full Control | Yes | Limited |
| User Interaction | Not Required | Required |
| Use Case | Professional | Help & Support |
Benefits of Remote Desktop
Access your PC from anywhere.
Increased productivity.
Simplified IT support.
Time-saving.
Conclusion
Enabling Remote Desktop on Windows 11 is an extremely simple and useful process. With the right settings and security measures, you can securely access your system from anywhere. Whether for professional work or personal use, this feature can completely transform your workflow.
FAQ (Frequently Asked Questions)
1. Can Remote Desktop be enabled in Windows 11 Home?
No, the Remote Desktop Server feature is not available in the Windows 11 Home Edition. For this, you require Windows 11 Pro or Enterprise.
2. Is an internet connection required for Remote Desktop?
Yes, if you wish to access your computer from a different network or remotely from outside your local network, an internet connection is necessary. However, within the same local network, a connection is possible even without the internet.
3. What is the default port for Remote Desktop?
The default port for Remote Desktop is 3389, which can also be changed as per your requirements.
4. Can I use Remote Desktop from a mobile device?
Yes, you can control your PC using the Remote Desktop app available on both Android and iOS devices.
5. What should I do if Remote Desktop is not working?
Ensure the PC is turned ON.
Check your internet connection.
Verify your firewall settings.
Enter the correct IP address and credentials.
6. Is Remote Desktop secure?
Yes, but to ensure security, you should:
Set a strong password.
Enable Network Level Authentication (NLA).
Use a VPN.
7. How many people can use Remote Desktop simultaneously?
By default, only one user can utilize Remote Desktop at a time; however, this setting can be modified via advanced settings.
Are you searching for the best hosting plan? Click now and get 20% off