Knowing your RAM (Random Access Memory) details in Windows 11 is essential for every user. Whether you want to check your system’s performance, plan an upgrade, or troubleshoot a technical issue, having accurate RAM information proves to be extremely useful.
In this comprehensive guide, we will show you the 9 easiest and most effective ways to check RAM information in Windows 11, which you can utilize without encountering any technical difficulties.
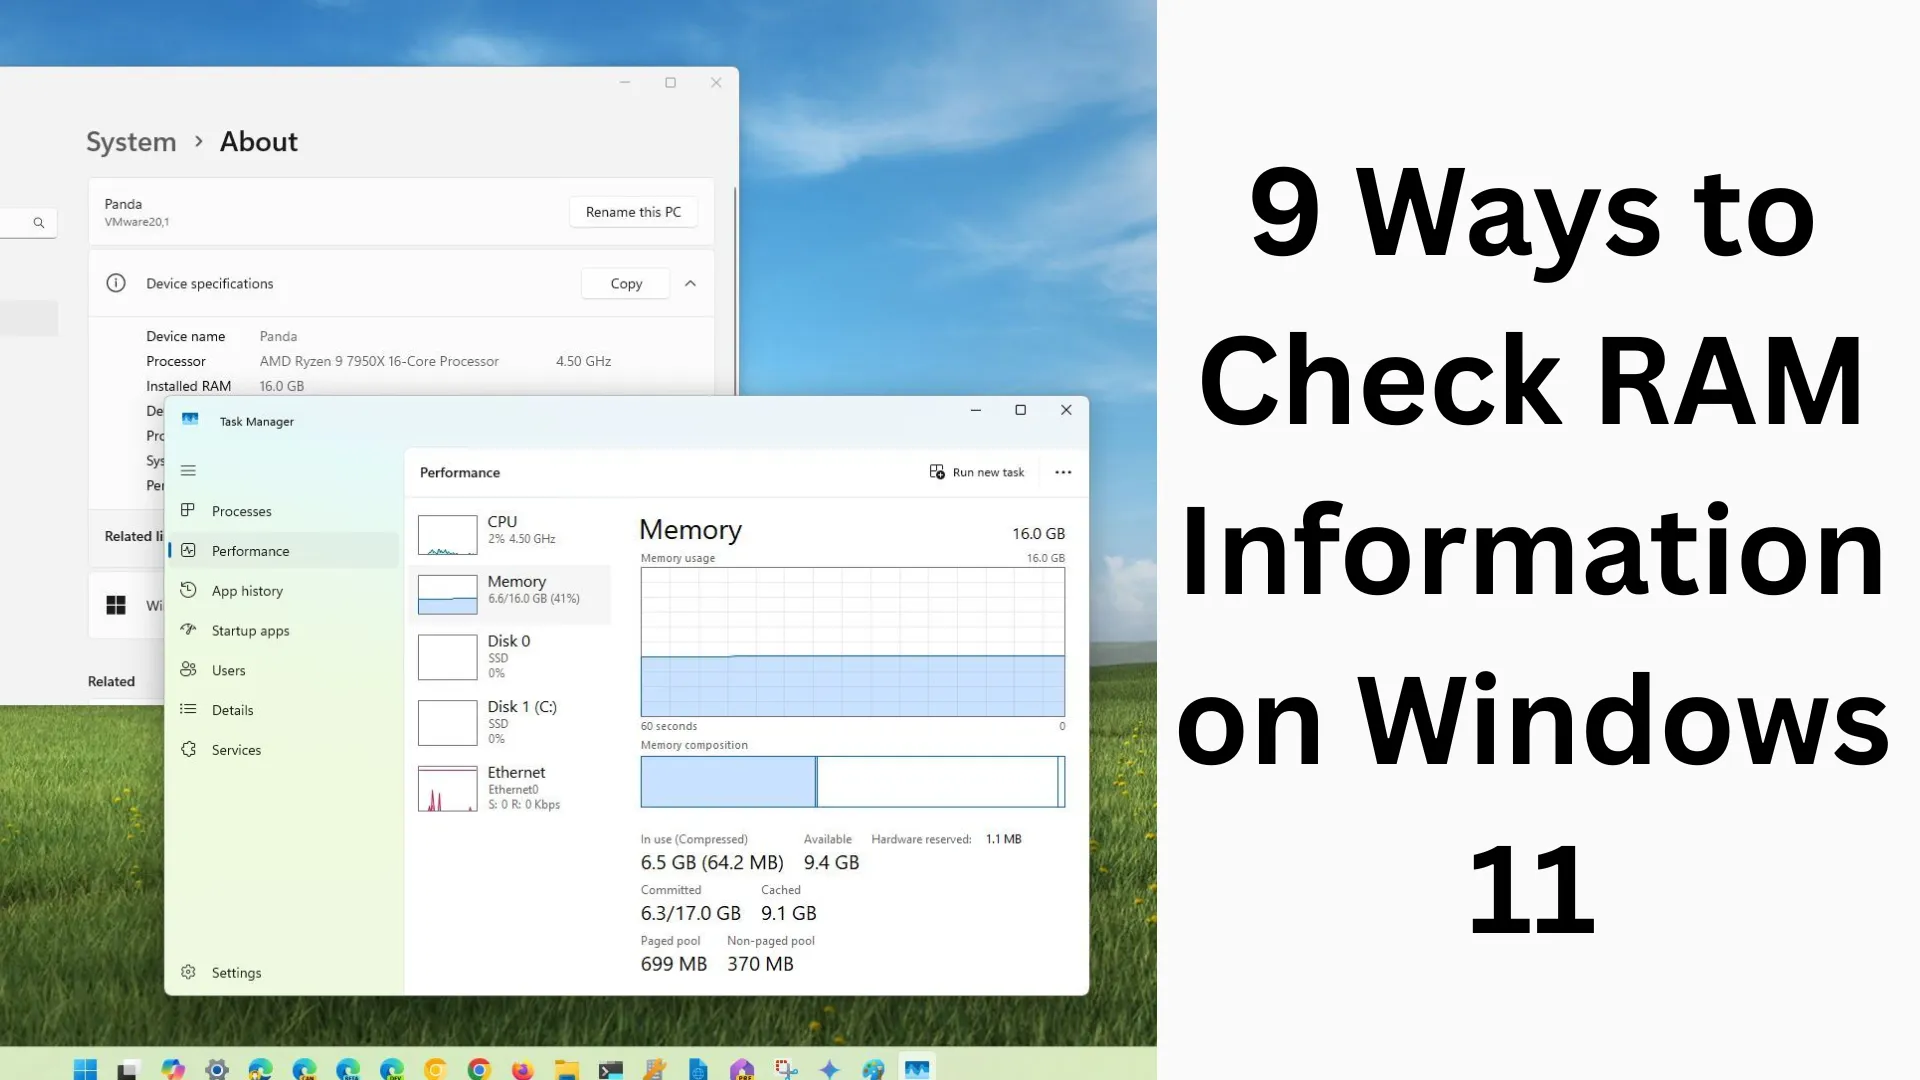
1. Check RAM Information via Task Manager
The Task Manager is the quickest and easiest method in Windows for viewing RAM details.
Steps:
Press Ctrl + Shift + Esc
Click on the “Performance” tab
Navigate to the “Memory” section
What Information You Will Find:
Total RAM
RAM Currently In Use
Available RAM
RAM Speed and Slots
2. View RAM Information via the Settings App
The Settings App in Windows 11 also offers a simple way to view RAM details.
Steps:
Press Windows + I
Go to “System” → “About”
What You Will See Here:
Installed RAM
System Type (32-bit or 64-bit)
3. Use the System Information Tool
This tool provides more detailed RAM information.
Steps:
Press Windows + R
Type: `msinfo32`
Press Enter
Key Information:
Installed Physical Memory
Available Memory
Virtual Memory
4. Get RAM Information via Command Prompt
You can also retrieve RAM information using the Command Prompt (CMD).
Steps:
Search for “cmd” in the Start menu
Select “Run as administrator”
Type this command:
“`
systeminfo
“`
Results:
Total Physical Memory
Available Memory
Also read: How to Download Torrent Files Using qBittorrent
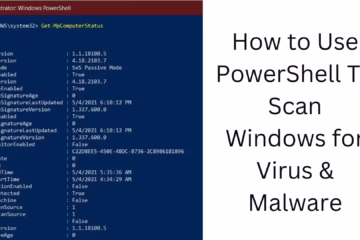
5. Use Windows PowerShell
PowerShell provides more advanced information.
Steps:
Search for “PowerShell” in the Start menu
Open it
Run this command:
“`
Get-ComputerInfo
“`
Or
“`
Get-WmiObject Win32_PhysicalMemory
“`
Benefits:
RAM capacity
Manufacturer
Speed
6. View RAM via the DirectX Diagnostic Tool (DxDiag)
This tool displays RAM details alongside information related to gaming and graphics.
Steps:
Press Windows + R
Type: `dxdiag`
Press Enter
Look Here:
RAM information within the “Memory” section
7. Check RAM Information via the Control Panel
An old but reliable method.
Steps:
Open the Control Panel
Go to “System and Security” → “System”
Find It Here:
Installed RAM
System Details
8. Use Third-Party Software like CPU-Z
If you want detailed hardware information, third-party tools are the best option.
Popular Tools:
CPU-Z
Speccy
HWInfo
Benefits:
RAM type (DDR3, DDR4, DDR5)
Frequency
Timings
Slot-wise details
9. View RAM Information via BIOS/UEFI
This is the most basic and accurate method, as it provides hardware-level information. Steps:
Restart your PC
Press F2 / DEL / ESC during boot-up
Enter the BIOS/UEFI
What you’ll find here:
Total RAM
Installed modules
Speed and configuration
Benefits of Checking RAM Information
Helps improve system performance
Simplifies upgrade planning
Assists in troubleshooting
Essential information for gaming and heavy software usage
Important Points Regarding RAM in Windows 11
Always use Dual Channel RAM for better performance
Pay attention to RAM speed and motherboard compatibility
Background apps affect RAM usage
A minimum of 8GB RAM is required for general use
Also read: Can’t Download or Update Apps from the Play Store? 9 Best Solutions (Fixes)
Conclusion
Checking RAM information in Windows 11 is extremely easy, and there are several methods available to do so. Whether you use the Task Manager or PowerShell, every method provides you with the necessary details. Based on accurate RAM information, you can optimize your system’s performance and make informed decisions regarding upgrades at the right time.
FAQs (Frequently Asked Questions)
1. How do I check RAM in Windows 11?
You can easily check RAM information using built-in tools such as Task Manager, Settings, Command Prompt, or System Information.
2. How do I find out how much RAM my computer has?
Open Settings by pressing Windows + I → Go to System → About; here, you will find complete details regarding Installed RAM.
3. Can I view live RAM usage in Windows 11?
Yes, you can view real-time RAM usage in the Task Manager → Performance → Memory section.
4. What is the difference between RAM and Storage?
RAM (Memory) stores temporary data and boosts system speed, whereas Storage (HDD/SSD) is used for permanent data.
5. Is 4GB of RAM sufficient for Windows 11?
4GB of RAM is adequate for basic tasks, but for better performance, you should have at least 8GB of RAM.
6. What are the benefits of upgrading RAM?
Increasing RAM:
Makes the system faster
Improves multitasking capabilities
Ensures gaming and heavy software run smoothly
7. Can I upgrade the RAM myself?
Yes, if you have basic knowledge of hardware and your motherboard supports it, you can easily upgrade the RAM yourself.
8. How do I check RAM speed?
You can check the RAM speed (in MHz) using Task Manager or PowerShell.
9. Does having more RAM always make a PC faster?
Not necessarily. Performance depends not only on RAM but also on the CPU, SSD, and system optimization.
10. Can RAM go bad?
Yes, if RAM fails, it can lead to system crashes, blue screen errors, or boot issues. In such cases, replacing the RAM becomes necessary.
Are you searching for the best hosting plan? Click now and get 20% off