Secure Boot is an important feature in the Windows operating system that keeps your computer safe from unauthorized software and malware. If you want to make changes to BIOS or UEFI settings, it may be necessary to enable or disable Secure Boot. In this article, we will explain in detail how you can turn it on or off.
What is Secure Boot?
Secure Boot is a security standard developed by UEFI (Unified Extensible Firmware Interface). Its purpose is to ensure that whenever the computer starts, only software that is verified by the manufacturer is loaded. This protects against boot-time malware such as rootkits.
Things to note before enabling or disabling Secure Boot
If you want to install Linux OS, older Windows versions, or any third-party driver, Secure Boot may need to be disabled.
After disabling Secure Boot, some security features like antivirus or BitLocker may not work.
Before changing BIOS/UEFI settings, make sure to back up your important data.
How to Enable or Disable Secure Boot (in Windows 11/10)
Carefully follow the steps given below:
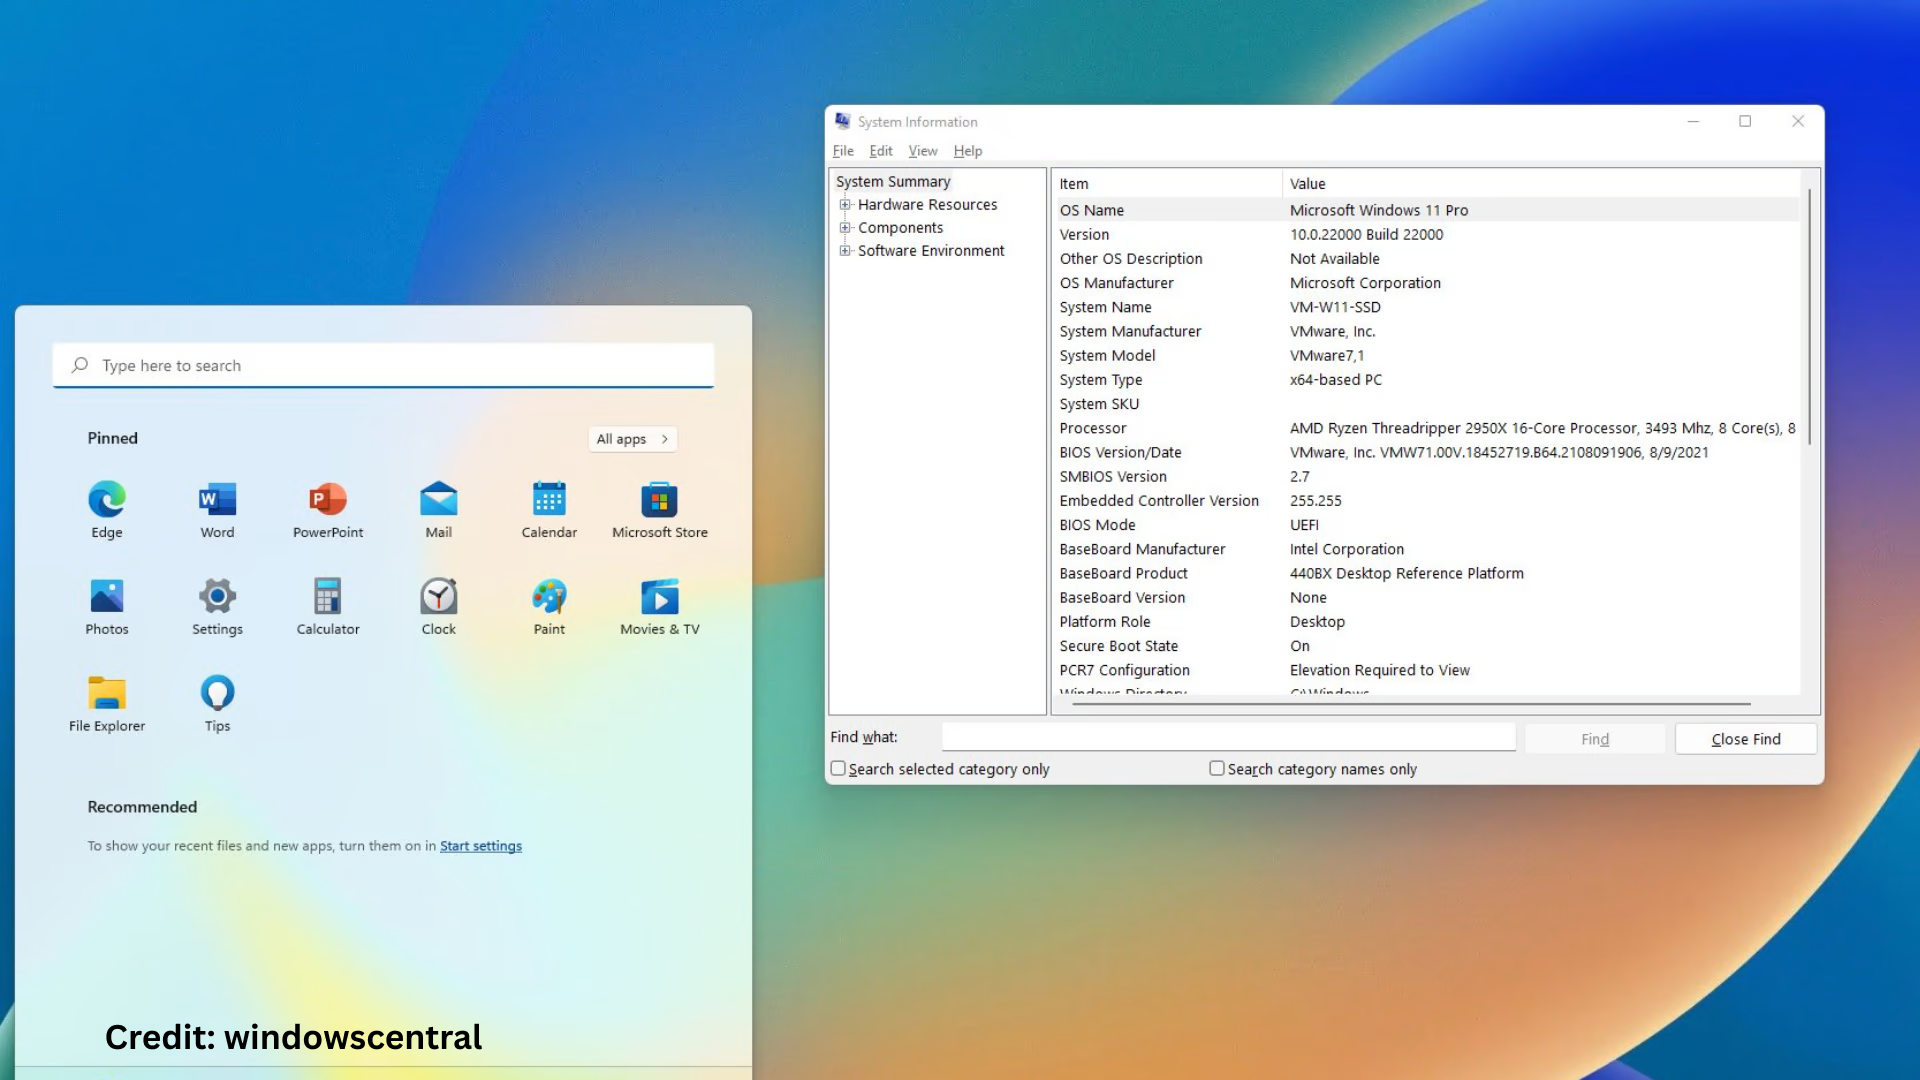
1. Check the status of Secure Boot from System Information
1. Go to the Start Menu and type “System Information”.
2. Open the app and search for Secure Boot State.
3. If “On” is written, it means Secure Boot is on. If “Off” is written, it is off.
2. Go to BIOS or UEFI Mode
To enable or disable Secure Boot, first go to BIOS or UEFI Settings:
Steps:
1. Click “Start” in Windows.
2. Press the Shift button and “Restart”.
3. Now go to the “Choose an option” screen:
Troubleshoot → Advanced options → UEFI Firmware Settings → Restart
3. Find Secure Boot Option in BIOS/UEFI
After restart, your system will boot into the BIOS/UEFI interface.
1. Navigate to the BIOS menu using the keyboard (usually using Arrow Keys).
2. Go to the Boot, Security, or Authentication tab (may vary by manufacturer).
3. Here you will find the Secure Boot option.
4. Enable or Disable Secure Boot
To enable:
Select the Secure Boot option.
Select “Enabled”.
You may also need to install Secure Boot Keys (if previously removed).
To disable:
Select Secure Boot.
Select “Disabled”.
If shown, also enable Legacy Support or CSM Mode.
> Some BIOSes may require you to set a password or enter Administrator Mode before disabling Secure Boot.
5. Save Changes and Exit
1. After making changes to the BIOS, save and exit the BIOS by pressing F10 or the relevant key.
2. Your system will now restart, and the Secure Boot settings will be applied.
Common Secure Boot Problems and Solutions
1. Secure Boot Option Not Appearing
Make sure your system is in UEFI Mode, not Legacy BIOS Mode.
If your hard disk is not in GPT format, Secure Boot will not appear.
2. Secure Boot Not Enabled
Disable the CSM (Compatibility Support Module) first.
Then enable Secure Boot.
Restore Secure Boot Keys by “Install Default Keys” or “Restore Factory Keys”.
Importance of Secure Boot in Windows
Malware protection: Secure Boot protects your system from dangerous codes such as rootkits.
Windows Updates and BitLocker: Many Microsoft features rely on Secure Boot.
System stability: It ensures that there is no tampering during the boot process.
When to disable Secure Boot?
Disabling Secure Boot is only advisable if:
You want to install Linux or a dual-boot system.
You need to install third-party unsigned drivers.
You plan to install custom ROMs or system modifications.
> Note that disabling Secure Boot may affect system security.
Problems after re-enabling Secure Boot
If you re-enable Secure Boot and your system is not booting:
Previously installed unsigned drivers or OS may be blocked due to Secure Boot.
In this case, you may have to go into BIOS again and disable Secure Boot.
Common BIOS Keys used to Enable or Disable Secure Boot
| Brand | BIOS Key |
| —— | ——— |
| Dell | F2 |
| HP | Esc + F10 |
| Lenovo | F1 or F2 |
| Acer | F2 |
| ASUS | F2 or Del |
| MSI | Del |
Conclusion
Secure Boot is an important feature to keep your system secure, but it may be necessary to disable it when you need to perform technical tasks like Linux installation or unsigned drivers. You can easily enable or disable it by carefully changing the BIOS/UEFI settings.
Want to grow your website organically? Contact us now
Frequently Asked Questions (FAQ) – On Enabling/Disabling Secure Boot
Q1. Is it safe to disable Secure Boot?
Answer: Yes, but only when it is needed, such as installing Linux OS or using unsigned drivers. However, disabling it may reduce the security of the system.
Q2. Windows is not booting after disabling Secure Boot. What to do?
Answer: Go back to BIOS and enable Secure Boot again, and also check that the Boot Mode is set correctly (UEFI or Legacy).
Q3. Why don’t I see the Secure Boot option in BIOS?
Answer: Your system may be in Legacy Boot Mode or the hard disk may not be in GPT format. Both UEFI and GPT are required for Secure Boot.
Q4. Does every computer have Secure Boot?
Answer: No, Secure Boot is available only in systems with UEFI BIOS. Older Legacy BIOS systems do not have this option.
Q5. Does Secure Boot block Linux installation?
Answer: Yes, some Linux distributions do not support Secure Boot. In this case, it may be necessary to disable Secure Boot.
Q6. Windows is giving an error after enabling Secure Boot again. What is the solution?
Answer: Unsigned drivers or OS installed before enabling Secure Boot may be blocked. To solve this, reset the Secure Boot Keys or disable Secure Boot again.
Q7. Are Secure Boot and TPM the same thing?
Answer: No. Secure Boot makes the boot process secure, while TPM (Trusted Platform Module) is for data encryption and hardware-based security of the system.
Q8. Is it necessary to keep Secure Boot on?
Answer: If you are using only Windows OS and system security is of paramount importance, it is better to keep it on.