Old or incorrectly connected Bluetooth devices in Windows 11 can cause problems with connection, audio, and auto-pairing. This guide covers every practical method, from Settings to Device Manager, so you can quickly and completely remove any mouse, keyboard, or headphone. Following the correct steps keeps your system fast and clutter-free.
As easy as adding Bluetooth devices to Windows 11 is, removing them from time to time is equally important. When old, unused, or incorrectly connected devices accumulate in the system, issues with connectivity, audio quality, auto-pairing, and battery life can arise. Here, we’re sharing the most reliable, step-by-step methods for quickly removing any Bluetooth mouse, keyboard, headphones, speakers, or phone and keeping the system clean and organized.
Things to Keep in Mind Before Removing a Bluetooth Device in Windows 11
Before removing a device, we should ensure that:
The device is not currently in active use.
If it’s an audio device, the music/call is off.
Admin permissions are available.
The device is nearby, so it can be re-paired if needed.
By keeping these simple things in mind, the removal process can be completed without errors.
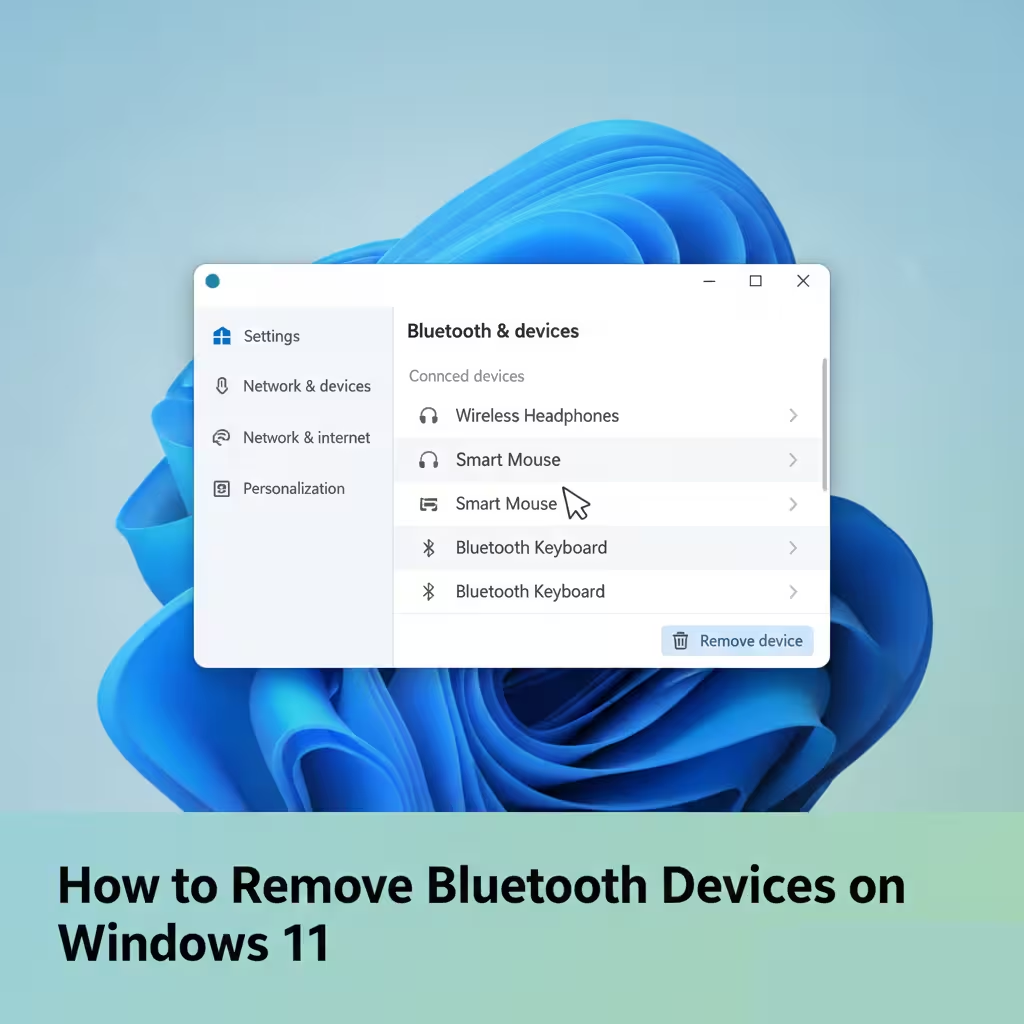
The Easiest Way to Remove a Bluetooth Device from Settings
This is the most commonly used and fastest method.
Step 1: Open Settings
Open Settings by clicking Start or pressing the Windows + I shortcut.
Step 2: Go to Bluetooth & Devices
In the left-side menu, click on the Bluetooth & devices option.
Step 3: View the Devices List
Here, we’ll see all paired devices – such as headphones, mouse, keyboard, etc.
Step 4: Select Remove Device
Click the three dots (⋮) next to the device you want to remove and select Remove Device.
Step 5: Confirm
A confirmation will appear – pressing Yes will remove the device from the system.
This method is fast, secure, and works in 90% of cases.
Managing Bluetooth Devices from Quick Settings
If we need to quickly access the device list, we can also do so from the taskbar.
1. Click the Network/Sound/Battery icon in the taskbar.
2. Right-click the Bluetooth icon.
3. Select Go to Settings.
4. Now remove the device using the steps described above.
Professional method for removing a Bluetooth device from the Control Panel
In some cases, removing a device from Settings won’t work. This method proves to be very effective.
Step 1: Open the Control Panel
Search for Control Panel in Start and open it.
Step 2: Devices and Printers
Here, we’ll see all the hardware connected to the system.
Step 3: Right-click on the Bluetooth device
Right-click on the device you want to remove.
Step 4: Remove Device
Click Remove and confirm.
This method often helps remove stuck or ghost devices.
How to Force Remove from Device Manager
If a device keeps coming back or won’t remove itself, we need to perform a deeper removal.
Step 1: Open Device Manager
Right-click on Start → Device Manager.
Step 2: Expand the Bluetooth section
Here we’ll find all Bluetooth drivers and paired devices.
Step 3: Uninstall Device
Right-click on the device → Uninstall device → Confirm.
Step 4: System Restart
After the restart, the device is completely removed.
How to Clear the Bluetooth Cache If It’s Not Removed
Sometimes Windows saves old information. Clearing the cache can fix the problem immediately.
Uninstall the Bluetooth Adapter from Device Manager.
Restart the PC.
Windows will automatically reinstall the driver.
After this, we can start the new pairing process.
Registry Method (For Advanced Users)
This method works when all other methods fail.
Open the Registry Editor.
Find the entry for Bluetooth devices.
Delete the corresponding key.
Restart the system.
This method is accurate but cautious.
Permanently Removing a Device That Keeps Connecting
If an old headphone or speaker keeps reconnecting on its own, then:
First, remove it.
Turn off or reset Bluetooth on that device.
Then scan again in Windows.
This stops the automatic connection.
How to Re-Pair After Removing a Bluetooth Device
Sometimes we need to reconnect a device.
1. Turn on Bluetooth.
2. Click Add Device.
3. Put the device in pairing mode.
4. Select a name → Connect.
Common Problems and Quick Fixes
Device Won’t Remove
Restart → Remove again.
Name appears in the list, but won’t connect
Uninstall from Device Manager.
Reconnects
Reset the device.
Benefits of Keeping a Clean Bluetooth List
- Faster Connections
- Fewer Errors
- Better Audio
- Battery Savings
- Smooth Auto-Pairing
A Clean System Always Works Better.
Our Conclusion
Whenever we use a new Bluetooth gadget, it’s essential to remove old devices. Proper removal makes the system lightweight, fast, and trouble-free. Using the methods above, we can remove any stubborn devices in minutes and enjoy new connectivity.
Also read: 7 Best Ways to Crop PDF Files Online
Frequently Asked Questions (FAQ)
1. What is the easiest way to remove a Bluetooth device in Windows 11?
The easiest way is to go to Settings → Bluetooth & devices → three dots next to the device → Remove device. This immediately removes the device from the system.
2. What if the Bluetooth device won’t remove itself?
In such a situation, open Device Manager, uninstall the device in question, and then restart the computer. In most cases, this fixes the problem.
3. Does removing a device permanently delete it?
No. The device only unpairs from the system. You can pair it again later.
4. Why does the device reconnect even after removal?
Many Bluetooth devices support auto-pairing. We should turn off or reset Bluetooth on the device so that it doesn’t connect automatically.
5. Can a Bluetooth device be removed without restarting?
Yes, a restart is usually not required. But if an error occurs, restarting completes the removal.
6. Why does a ghost or old device appear in the Bluetooth list?
This is caused by system cache or outdated driver data. Uninstalling from Device Manager and restarting removes it.
7. Can multiple Bluetooth devices be removed at once?
Yes, we can go to each device one by one and select Remove device. Windows doesn’t provide a separate button for bulk removal.
8. Does removing devices affect the internet or other connections?
No, this only unpairs that Bluetooth device. Wi-Fi or other connections are not affected.
9. Can devices associated with a Microsoft account also be removed?
Yes, if they are connected to the PC via Bluetooth, they can be removed as usual.
10. What should I do to avoid recurring Bluetooth issues?
Remove old devices, keep drivers updated, and turn off devices that are not in use. This keeps the connection stable.


One thing I’ve noticed is that removing devices in Device Manager is especially helpful when Bluetooth issues persist after resetting. It might not be obvious to everyone, but it’s a great tip!